Scanning Instamatic 126 Format Slides
2016-01-30
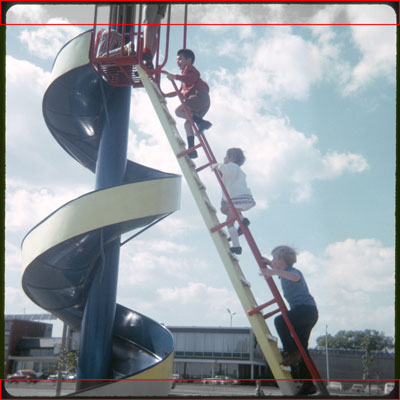
When scanning archives from the 1960s and 1970s, you may encounter 126 format "Instamatic" slides.
Most film scanners have sensors designed for the 36x24mm image area of conventional 35mm film (more formally known as 135 format). The image area for 126 film is 28x28mm, which is 4mm taller than most scanners can see. A flatbed scanner with good film support can get everything, but these are generally less effective than a dedicated film scanner.
I suspect that most people just satisfy themselves with the central 28x24mm portion of the Instamatic image, losing a 2mm band on the top and bottom. Most photos are framed so that the important details are in the center, but I use this procedure to capture the whole thing.
This only works for slides. You'll have to settle for a flatbed scanner if you have 126 negative strips.
Technique
This technique assumes that you have a scanner with a separate slide holder. This works well with my Primefilm-Reflecta 7200, and should work with Plustek or other scanners that uses a similar holder.
There is usually some slack so that you can shift the slide a bit, which lets us scan the whole slide in two passes, then manually merge the results.
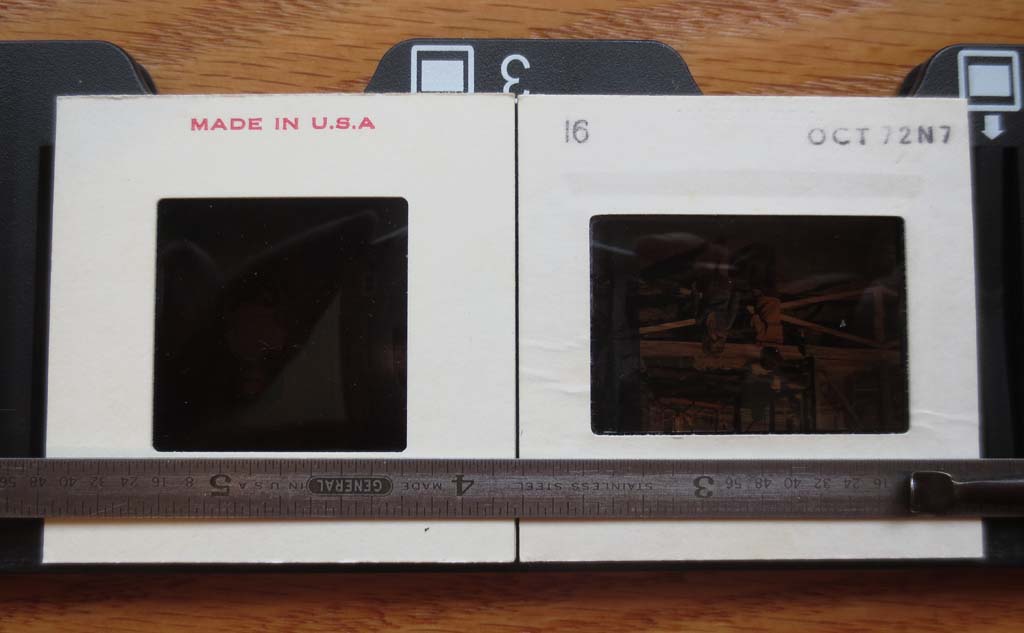
Start with a normal 35mm slide. Insert it in the holder and then mark guides on each side of the holder at the edge of the image area. We know that the sensor in the scanner can see at least to this point.
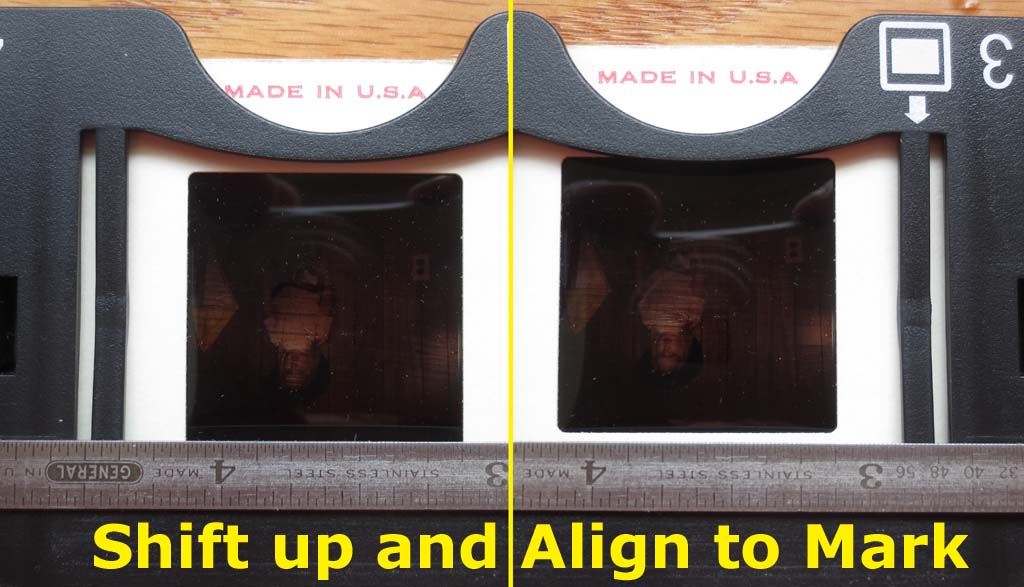
Next, use these guides when inserting a 126 slide. If you insert the 126 slide fully, the top 2mm of the image will be out of range, so shift the slide down slightly so that the top edge of the film aligns with your guides.
Scan the slide to capture the top-most part of the image, then remove, rotate 180° and repeat the process to scan the bottom-most part.
Sew both images together in Photoshop and crop. The details below discuss how to keep the scanning parameters consistent between passes so that it is easier to merge the images.
Details
In order to maintain consistency between scans, I follow the steps below. These are described in terms of VueScan, but there should be similar capabilities in whatever you are using to drive your scanner.
- Set your output to save the scans as TIFF rather than JPG since you will be editing them. You should also save to a separate working directory so you don't confuse the partial scans with the finished product.
- Insert the slide and preview the first half.
- Set exposure and lock
- Set color to manual. This disables any automatic white balance and keeps the color consistent between the two slides. Adjust the black/white point, curve low/high as appropriate and keep it the same for both scans.
- Scan the top half, then rotate and scan the bottom half.
- There is no need to preview again, just scan. Leave the cropping at maximum because you will just crop later.
- In a four slide holder, I use position #2 or #3 because the inner ones seem have the most stable positioning.
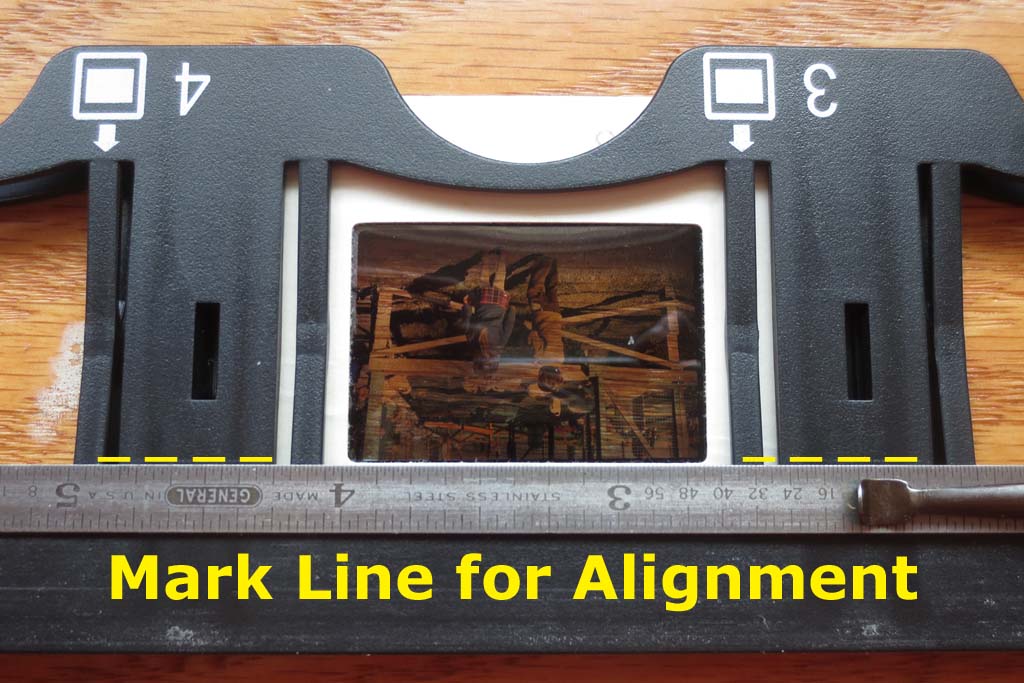
- As shown above, it is helpful to score a line on you slide holder to know where to shift the edge to. Just put in a normal 35mm slide and mark the top edge of the window.
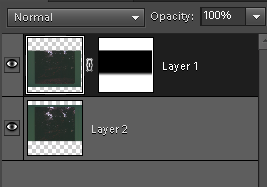
- Combine both scans into Photoshop
- Add as layers to a new 5000x5000 image, or whatever dimension works for your scanner resolution. Rotate the bottom by 180 degrees
- Add a mask to the top layer, revealing all (Layer | Layer Mask | Reveal All)
- Apply a gradient to the edge of the mask. Use the gradient tool, set to black and white, and drag a line near the edge.
- Align the layers. You may need to adjust the brightness slightly, or rotate one of the layers by a few degrees to get a good match.
- Crop to 3840x3840 or as appropriate for a scanner resolution other than 3600dpi)
- Save as a JPG file.